
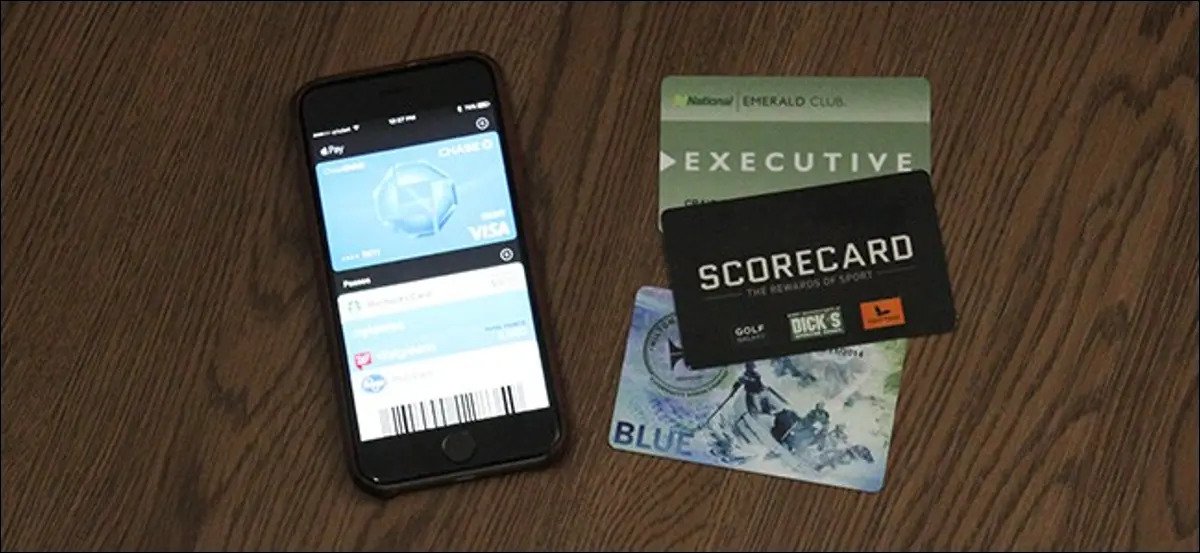
Are you looking for a way to store all your cards in one place? Are you tired of carrying around a bulky wallet or purse full of loyalty cards, credit cards and more? If so, the iPhone Wallet app can be your savior. It’s an incredibly convenient way to keep all your important cards together in one secure and easily accessible location. But what if the card you want to add isn’t officially supported by Apple? Don’t worry – there are still ways to add any card to the Wallet app on your iPhone.
I’m also one of those people who’s always searching for an easy way to keep track of all my cards. And that’s why I decided to look into ways of adding non-compatible cards to the Wallet app. In this article, I’ll walk you through the simple steps required to get any card up and running on your iPhone so you can easily access and manage it. Let’s get started!
How to Add Any Card to the iPhone Wallet App
In reality, everything that has a barcode will function with the Wallet app; all it takes is an app to submit the barcode to Wallet. That’s where Pass2U Wallet comes in—it accomplishes the same thing as the Fandango or Walgreens apps, but with any barcode.
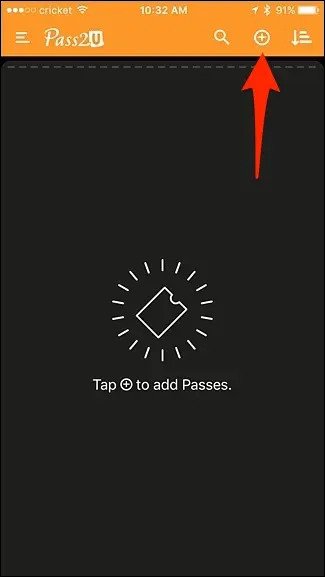
To get started, download the app to your phone and then launch it. There is no need to create an account or anything else—the app is ready to use the moment you launch it for the first time. Tap the + button in the upper-right corner of the screen.
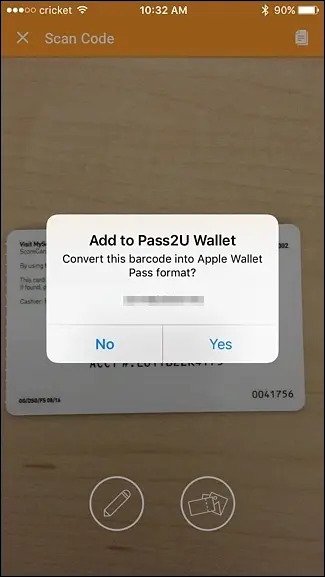
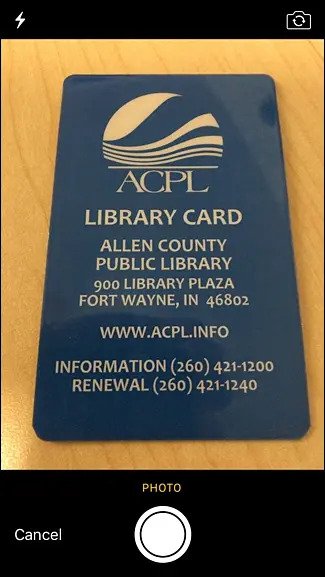
You must provide the app access to your phone’s camera in order to scan the barcode on the card. Simply position the barcode within the camera’s sights, and it will scan it automatically. When the pop-up displays, tap “Yes” to validate the barcode number.
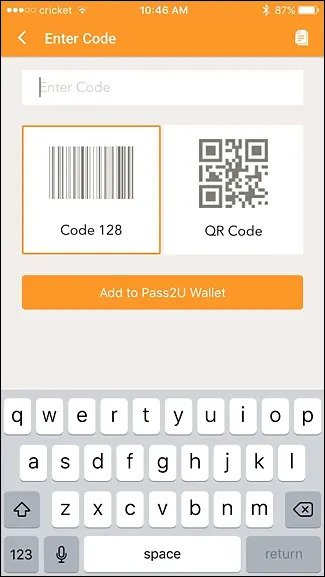
If the program does not automatically scan the code, you may manually input the barcode number by tapping on the pencil icon towards the bottom.
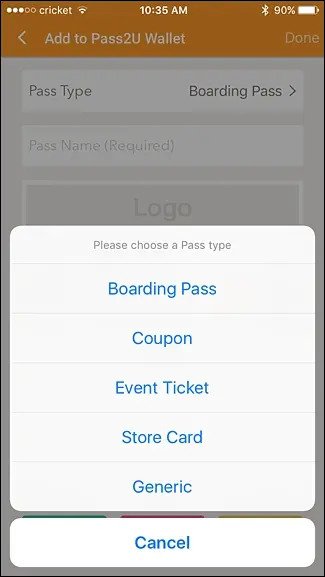
Next, select what type of pass you’re digitizing. If none of the options fit, just select “Generic”.
Also Read
How to Take a Screenshot by Tapping the Back of Your iPhone
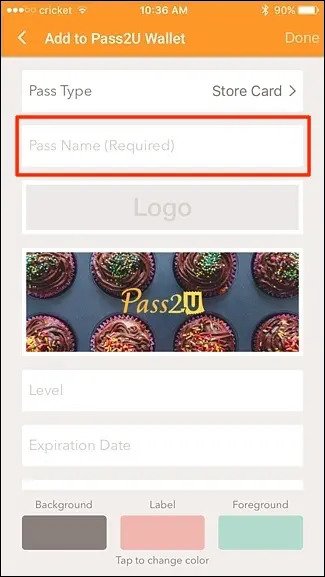
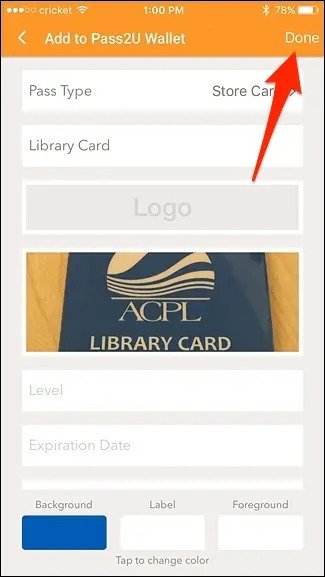
Then, press “Pass Name (Required)” and input a name for the digital barcode that you scanned in.
The rest is absolutely optional, but if you want to alter the appearance of your digitized pass, you should use the customization tools. To begin, touch the Pass2U logo.
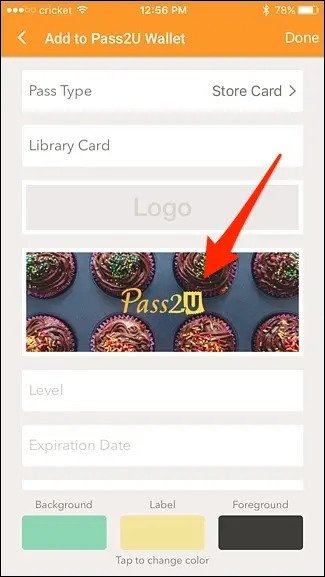
This will allow you to take a photo and upload it to the pass, then adjust the overall style and colour of your pass. The “Add Field” section will let you add a few more details, such as contact information if needed.
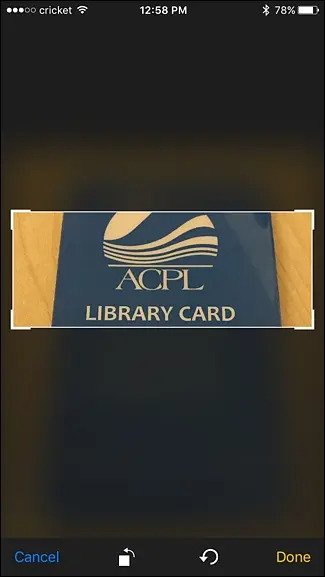
After taking the photo, crop it, select which color template you want to use and then edit the fields as necessary. Then press “Done”. In this way, you can customize the look of your pass and make it your own.
Now put the information of the card, like name, expiry date and card number, in the empty field. So, all your information is ready now.
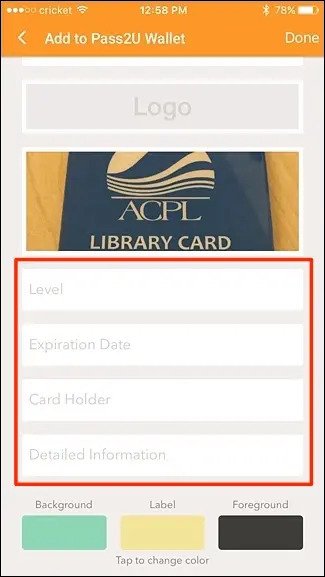
In the end, you can customize the color and style of the pass, and if you want to add any other information like contact details, you can do that too. The label is the last part, where you have to put the name of your card, and the foreground is the background color.
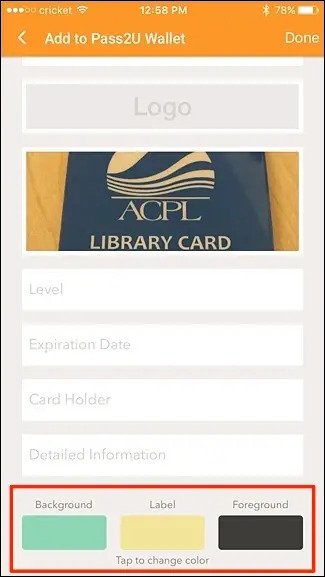
You can tap on selection and can make your own background color. After all these steps, the pass is ready to be saved and go into your Apple Wallet.

After that, tap on “Done” in the top-right corner of the screen.
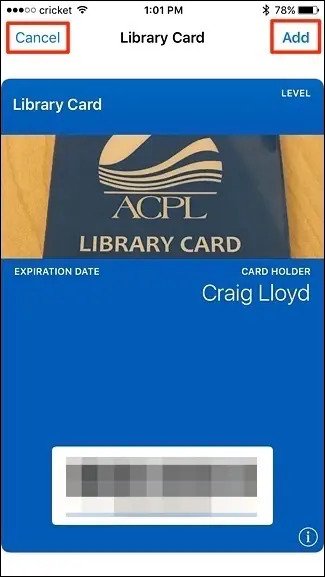
You can see a preview of your pass on the next screen, and after that, you’ll see the “Add to Apple Wallet” option. Tap on it and then hit “Add” to finally add the pass to your Wallet app.
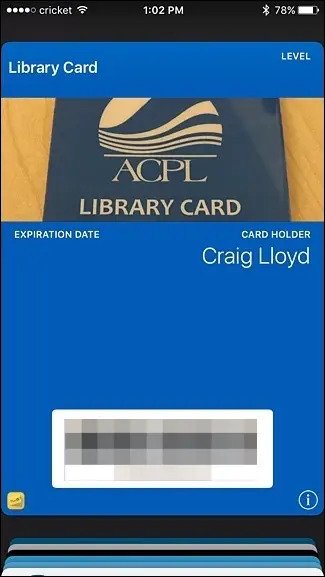
When the pass is officially produced, it will be added to your iPhone’s Wallet app. It will also display on the Pass2U app, but you do not need to open the pass in Pass2U to utilize it; just use the Wallet app.
You can delete the pass within Pass2U if you no longer want to use it. To do so, open the app and choose “My Wallets” at the bottom of the screen. Then locate your pass and press its delete icon on the following page.

Pass2U support both Apple Wallet and Google Pay, so you can use this app to add any kind of card or passes to your mobile digital Wallet. The entire process takes only a few minutes, and you’ll never have to worry about forgetting your card ever again. It also supports Barcode and QR Code scanning. Pass2U Wallet is a great way to simplify your digital life. Enjoy!
There you go; that’s how you can use Pass2U to digitize your cards and passes in just a few simple steps. It’s a great way to keep all your important cards organized and with you everywhere you go. Give it a try today!
Conclusion
Overall, adding any non-compatible card to the iPhone Wallet app is a simple process. By following the steps outlined in this article, you’ll be able to store all your important cards together in one secure and easily accessible location. Whether it’s loyalty cards, credit cards or business cards – with just a few taps of your finger, you can add them to the Wallet app on your iPhone. Now that you know how to do it yourself, why not give it a try? You won’t regret having all those conveniences at hand!